

Image: Jason Cohen
The process of lost-wax casting is some of the most fulfilling and challenging work we do at MIMOSA.
The journey of taking something from an idea to its physical manifestation still feels like magic, but we promise you, it’s anything but.
LOTS of science, tedious work, careful measurements, calculations, and timing go into this work we love to do.
SEE IT IN ACTION: Watch our full process — from sketching to shipping!
video by Jason Cohen
What is Lost-Wax Casting?
Lost-wax casting isn’t a new process by any means. In fact, it’s an ancient art.
From start to finish, it takes about a full week to bring a wax piece to life in either bronze, sterling silver, or 14K gold — and it all happens in-house at our south Louisiana studio.
We're honored that the jewelry we're casting here at MIMOSA will be a part of the lost-wax cast pieces out in the world.
MIMOSA and Lost-Wax Casting
When MIMOSA first got its start back in 2008, we weren’t using the lost-wax casting method.
Madeline was still experimenting with mediums on her own. She was stringing beads, playing around with precious metal clay, and even making loads of jewelry out of Shrinky Dinks - remember those?
From there, she primarily made ceramic jewelry but also dabbled in enameling copper and traditional bench jeweler work with silver.
When Dawson joined her at MIMOSA in 2015, they landed on lost-wax casting as MIMOSA's primary jewelry-making method.
And that's still the same method in use today.

Madeline's enameled earrings (left) and precious metal clay "You Are My Sunshine" pendants. (right)
We currently cast in-house once a week. This is partially because our prep work for casting takes several days, and is also why it can take up to 2 weeks (or longer, in some cases) before a piece is ready.
Because each step in the lost-wax casting process is delicate and crucial to the next, jewelry doesn't always come out successfully in the cast if even one little thing is off — for reasons both in and out of our control.
It can be a bummer to lose a week's worth of work, but it makes a successful cast even more exciting!
So, how does it all happen? — Learn how your favorite MIMOSA piece went from wax to wearable below!
. . . . . . . . . . . . . . . . . . . . . . . . . . . . . . . . . . . . . . . . . . . . . . . . . . . . . . . . . . . . . . . . . . . . . . . . . . . . . . . . . . . . . . . . . . . . . . . . . . . . . . . . . . . . . . . . . . . .

. . . . . . . . . . . . . . . . . . . . . . . . . . . . . . . . . . . . . . . . . . . . . . . . . . . . . . . . . . . . . . . . . . . . . . . . . . . . . . . . . . . . . . . . . . . . . . . . . . . . . . . . . . . . . . . . . . . .
The Process Of Lost-Wax Casting
Step 1 — Create the original design in wax
Every piece starts as an idea. Then it becomes a sketch.
Once a potential piece is sketched, it's time to bring that piece to life in wax. (This is where the lost-wax casting process begins.) There's no specific timeframe for this part. It can take days, weeks, or even months before an original design is ready in wax.
The final wax version of a piece will look like its finished metal version. Except, you know, in wax.
*Madeline carves the majority of MIMOSA pieces by hand. Several pieces have their design stamped into the wax or are brought to life through 3D design.
Madeline carves a piece in wax at her desk. — Image: Tahjah Harmony, Quaint + Whim
Step 2 — Take a Mold
We either take a silicone mold of the original piece in wax or the "master" once it's successfully cast in metal. From that mold, ready-to-cast duplicates of the original are created.

Each piece in our collection has its own silicone mold. — Image: Jason Cohen
Step 3 — Building Wax Trees
The next step of lost-wax casting is building wax trees. Each wax piece is attached to a wax sprue (that's the slender part in the middle) to make the wax tree.
The wax piece also has a sprue of its own. These sprues (which are removed from each piece after casting) help carry the molten metal to each part of the design — More on that in the next few steps.

Step 4 — Investing
Once the wax tree is built, a metal flask is fitted over the tree and secured, and a plastic sleeve is fitted over each flask.
We then prepare a specialized fine plaster mixture called "investment" and pour it into each flask, fully submerging the wax tree.
We place the flask into a vacuum chamber to help remove any air bubbles that may have formed in the plaster.
This material hardens to make a solid shell around the wax, which completes this step of lost-wax casting.

A wax tree is invested. — Image: Jason Cohen
Step 5 — Burnout
Each invested mold is turned upside down and placed in a kiln to burn out the wax tree inside — this is the “lost wax” part. This leaves a void in the investment, which the molten metal will later fill.Once this part of the process is complete, the flasks spend the night in a hot kiln to prepare them for casting the next day.

Flasks during the burnout process. — Image: Anna Catherine Cuccio
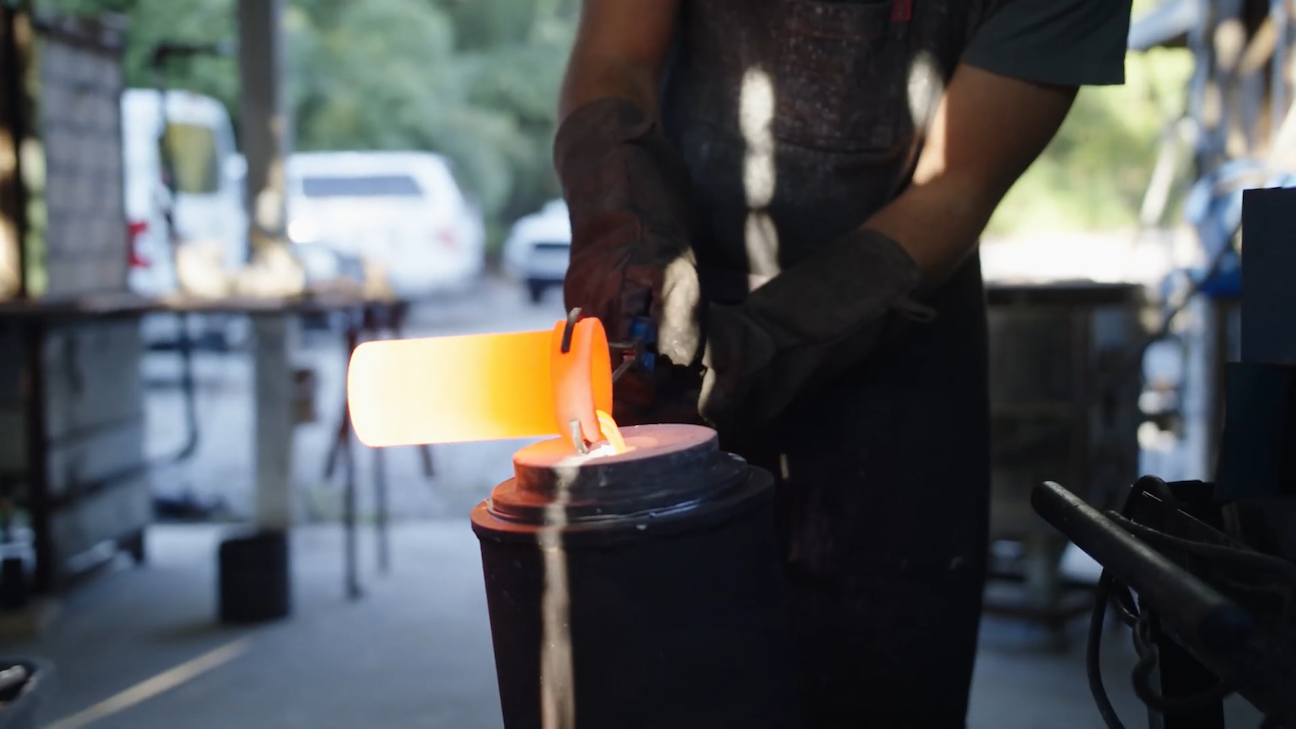
Step 6 — The Pour
Bronze is the metal we use most often in our process of lost-wax casting. Bronze casting grain (that's really small pieces of bronze) is heated up until it becomes molten metal.
Each flask is removed from the kiln and placed inside a vacuum chamber. The molten metal is then poured into an opening in the mold left by the center sprue. Both the suction from the vacuum and the flask's high temperature help the molten metal travel throughout the sprues to each piece until the entire void fills with metal.
The metal will harden extremely quickly.

Andrew casts bronze jewelry. — first image: Tahjah Harmony, Quaint + Whim, second & third images: Jason Cohen
Step 7 — Quenching & Devesting
Each flask is dunked into water to help remove and dissolve the investment.
After a good rinsing (with a power washer), the solid metal, freshly cast jewelry is visible. If the cast was successful, these pieces will look just like their original wax version!

Andrew quenches a flask. (left) - Image: Jason Cohen —— The freshly cast jewelry is visible. (right) - Image: Tahjah Harmony, Quaint + Whim
. . . . . . . . . . . . . . . . . . . . . . . . . . . . . . . . . . . . . . . . . . . . . . . . . . . . . . . . . . . . . . . . . . . . . . . . . . . . . . . . . . . . . . . . . . . . . . . . . . . . .
video by Jason Cohen
. . . . . . . . . . . . . . . . . . . . . . . . . . . . . . . . . . . . . . . . . . . . . . . . . . . . . . . . . . . . . . . . . . . . . . . . . . . . . . . . . . . . . . . . . . . . . . . . . . . . .
This is the last part of the lost-wax casting before we move on to finishing the piece. These next few steps bring the jewelry to its shiny, smooth, and wearable form.
Step 8 — Clip and Clean
Each jewelry piece is clipped off the tree and tumbled along with these tiny, abrasive triangles. This helps remove any remaining investment and starts to smooth rough edges.

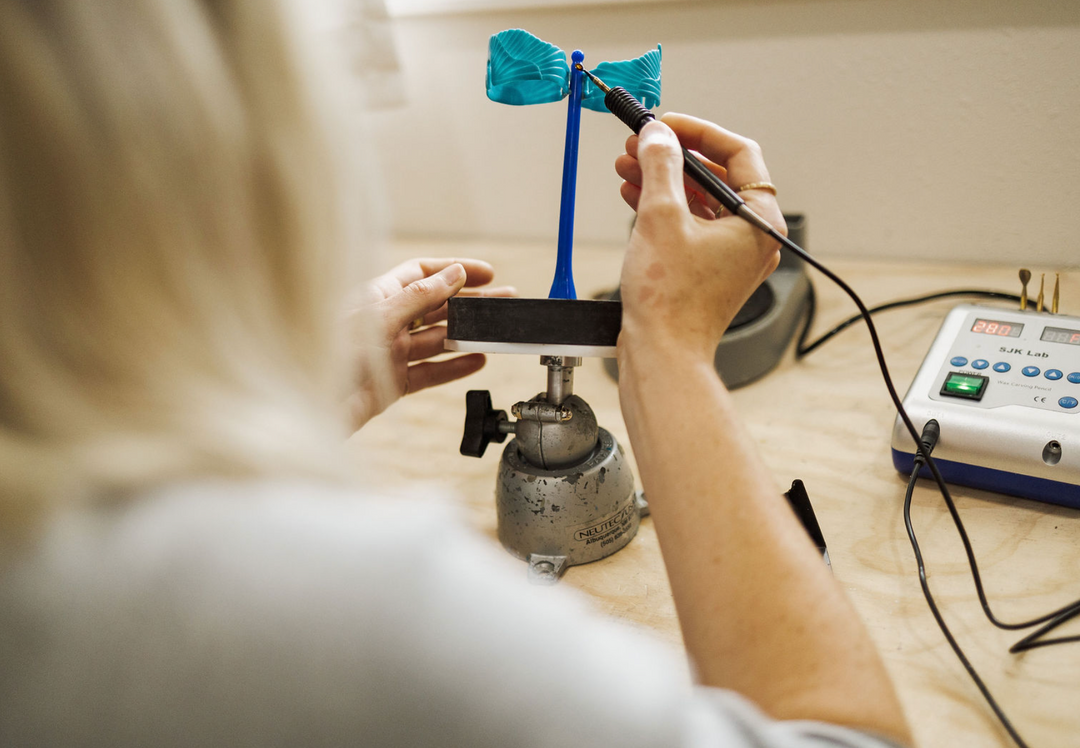
Step 9 — Buffing and Polishing
Using a variety of tools, our buffing team transforms each unfinished piece into its wearable form.

Donna buffs a "You Are My Sunshine" Pendant. — Image: Tahjah Harmony, Quaint + Whim
Step 10 — Quality Control & Assembly
Each piece of MIMOSA is inspected before it ever makes its way to our assembly and shipping room. Once a piece passes inspection, we send it over to shipping where it can be used to fill orders!

Sarah inspects a Loblolly Pine Needle Cuff during quality control. — Image: Tahjah Harmony, Quaint + Whim
Published 6/30/21; Last Updated 12/21/22
Leave a comment